Shared Concepts
DigiKey API Products have shared principles, they include:
OAuth
DigiKey APIs implement the OAuth 2.0 authorization framework. The Oauth2 framework is the industry standard way to give third-party applications secure delegated access to protected resources. Every request made to a DK API will require an access token.
The expectation is you will be familiar with OAuth 2.0 and its utilization of the authorization code grant flow, authorization endpoints, token endpoints, redirection endpoints, bearer tokens, and refresh tokens. The authorization code grant flow is the only permitted way of accessing DK APIs.
TLS
To protect both parties’ resources, all HTTP traffic is secured using the TLSv1.2 encryption protocol. Client applications will be developed to use TLSv1.2. When accessing DK resources, please validate the endpoint and that it uses TLS.
Access Control
To protect both parties’ resources it is important to keep the client application’s Client ID and Client Secret private and secured. Third-party applications are assigned a Client ID and Client Secret. Both the Client ID and Client Secret are unique to the third-party application. They should be secured and should never be made public.
Rate Limits
DK API products have rate quotas. Rate limits are applied at product level. An application is rate limited by both the number of requests per minute and number of requests per day at the product level.
The rate limits below are for standard products.
| Standard Product | Rate limit per minute | Rate limit per day |
|---|---|---|
| Barcode | 120 per minute | 1000 per day |
| Create BOM | 10 per minute | - |
| Order Support | 120 per minute | 1000 per day |
| Ordering | 10 per minute | - |
| Product Information | 120 per minute | 1000 per day |
| Quoting | 10 per minute | - |
Every API response is accompanied by the following set of response headers to identify the status of your client application's consumption.
| Header | Description |
|---|---|
X-RateLimit-Limit | The maximum number of requests that the consumer is permitted to make per day. |
X-RateLimit-Remaining | The number of requests remaining in the current rate limit window. |
Once an application hits a rate limit window, the client application will receive a status code of:
429 Too Many Requests
If the burst limit window is exceeded, the response headers will show:
| Header | Description |
|---|---|
| Retry-After | The seconds until you can retry the request |
| X-BurstLimit-Limit | The maximum number of requests allowed for the API, number per minute |
| X-BurstLimit-Remaining | The number of requests remaining in the current rate limit window. |
| X-BurstLimit-Reset | The seconds until the burst limit window resets |
| X-BurstLimit-ResetTime | The time when the burst limit window resets, GMT |
and the JSON response message will be like:
{
    "ErrorResponseVersion": "3.0.0.0",
    "StatusCode": 429,
    "ErrorMessage": "BurstLimit exceeded",
    "ErrorDetails": "Please try again after the number of seconds in the Retry-After header",
    "RequestId": "fa3e4d88-bfc4-4565-c6d5-a567633c091b",
    "ValidationErrors": []
}
If the daily limit window is exceeded the response headers will show:
| Header | Description |
|---|---|
| Retry-After | The seconds until you can retry the request |
| X-RateLimit-Limit | The maximum number of requests allowed for the API |
| X-RateLimit-Remaining | The number of requests remaining in the current rate limit window. |
| X-RateLimit-Reset | The seconds until the exceeded rate limit window resets |
| X-RateLimit-ResetTime | The time when the rate limit window resets, GMT |
and the JSON response message will be like:
{
    "ErrorResponseVersion": "3.0.0.0",
    "StatusCode": 429,
    "ErrorMessage": "Daily Ratelimit exceeded",
    "ErrorDetails": "Please try again after the number of seconds in the Retry-After header",
    "RequestId": "f4a0c1ab-8b47-4a72-e010-8ebe5d78f96c",
    "ValidationErrors": []
}
Status Codes
Each API documents the status codes it will send. The response codes returned follow RFC 22616 specifications. Generally the status codes returned are:
| HTTP Status Code | Description |
|---|---|
200 OK | Successful. |
400 Bad Request | Bad input parameter. Error message should indicate which one and why. Somehow your client request is malformed/invalid. Also possible, but less likely, the requested part has not been found. |
401 Unauthorized | The client passed in the invalid access token. Client should refresh the token and then try again. Or you have not subscribed the client application to a DK API product. |
404 Not Found | Resource not found. |
405 Method Not Allowed | The resource doesn't support the specified HTTP verb. You are making a request in a format that is not expected. Example is making a GET request when the data needs to be presented as POST. |
429 Too Many Requests | Too many request for rate limiting. Too many requests in a given period of time (>120 per minute), or more than allowed during the current rate limit window. |
500 Internal Server Error | Servers are not working as expected. The request is probably valid but needs to be requested again later. |
503 Service Unavailable | Service Unavailable. |
Support
For technical concerns about accessing or using DK APIs, visit the support page.
Developer
Developers register a client application to access DK API Solutions. In order for a developer to register an application, they must create a DK API Solutions account on https://developer.digikey.com.
After successful registration the developer will sign in into the developer portal. Successful login will now display the developer's name along the navigation bar:

Selecting the drop down on the developer's name, we see the developer now has access to the Sandbox and can create Sandbox applications.

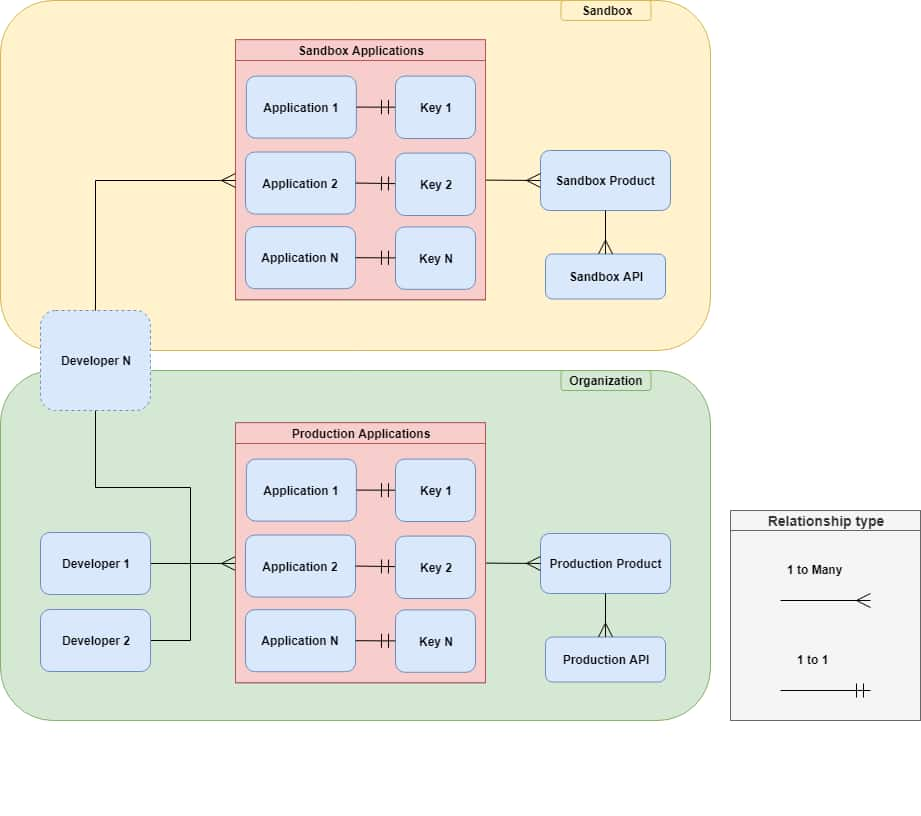
Sandbox
The Sandbox is meant to be a safe way to test client application development against an API which will provide a valid data response structure, while not actually making production requests. The data returned from a Sandbox API may not be complete, but the structure of the Sandbox API response will be a representation of what to expect in Production. Sandbox is the first environment that a developer has access to.
The purpose of the Sandbox is to test your code’s ability to communicate with DigiKey APIs (authorization and authentication). The response received will have the correct data structure but the data itself may not match the request.
When you have confirmed your ability to communicate with our APIs we recommend that you switch to the production versions.
Sandbox Applications
A Developer creates Sandbox applications. Sandbox apps are only available to the developer creating them. Sandbox applications are not shared.
Registering a Sandbox Application
Begin by selecting the drop-down menu under the developer's name and selecting Apps:

Click the Create Sandbox App Button:

Fill the form using the information specific to your application, then click Add sandbox app button:

The Sandbox application has been created:

Viewing Sandbox Application Properties
To view an applications properties, click the applications name. To edit the application, click the Edit link.

Here we see both the developer defined properties for the application, along with a set of credentials registered to the application:

By selecting the Edit tab, you can edit the application's developer defined properties.
Deleting an Application
An application can be deleted from the My Sandbox Apps page:

or by clicking the delete tab when viewing the application's property page:

The site will confirm that you want to delete the application by entering and submitting a provided string:

The application is deleted:

Organization
To make a production call to DigiKey APIs a developer must create, or be a member of, an organization. An Organization can have one or more members. An Organization should invite their co-developers to their created Organization. One or more members of an organization can be assigned the role of Organization Administrator. The role of Organization Administrators permits select members to manage their Organization’s users and applications.
A company should create one Organization using their Company’s registered name or domain address.
Production
Organizations create production applications. Production applications make requests to production APIs.
Production Applications
Production applications send and receive traffic from our production APIs and backend services. Production is the "live" environment for client applications. Production applications are created by Organizations.
All applications created by an Organization are production applications. An Organization's applications are shared between the Organization members.

Registering an Organization Application
As stated earlier, in order to make an Organization Application, you must either have created an organization or have been added as a member to one.
Begin by clicking Organizations on the navigation bar:

Then select Production Apps located under Operations:

Click the Create Production App Button:

Fill the form using the information specific to your application, then click Add production app button:

The Production application has been created:

Viewing Organization Application Properties
To view an application's properties, click the app name. To edit the application, click the Edit link.

Here we see both the developer defined properties for the application, along with a set of credentials registered to the application:

By selecting the Edit tab, you can edit the application's developer defined properties. By Selecting the Delete tab, you can begin application deletion.
Deleting An Application
An application can be deleted from the Production Apps page:

or by clicking the delete tab when viewing the application's property page:

The site will confirm that you want to delete the application by entering and submitting a provided string:

The application is deleted:

Organization Administrator Role
The Organization Administrator Role manages members for the Organization. Members with this role have the privileges of other developers to the organization. The Organization Administrator can also assign the Administrator Role to other developers.
Adding a member to the Organization
Before a new member can be added to an organization, the invitee must already be registered on the developer portal. Only a member with the Organization Administrator role can add other developers to an Organization.
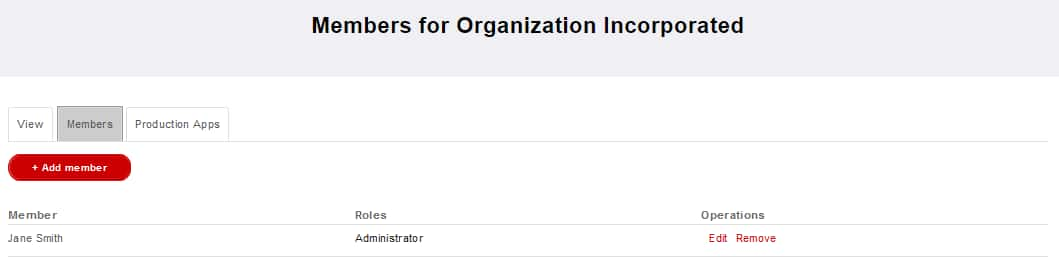
The Organization Administrator begins adding a member to their organization by clicking the Add member button from the Members page:
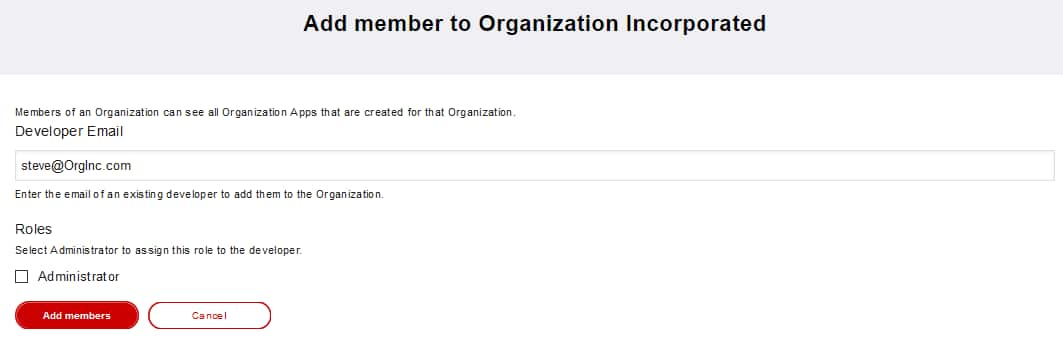
Fill the form using the email address of the developer to add, and determine if they should have the Organization Administrator role:
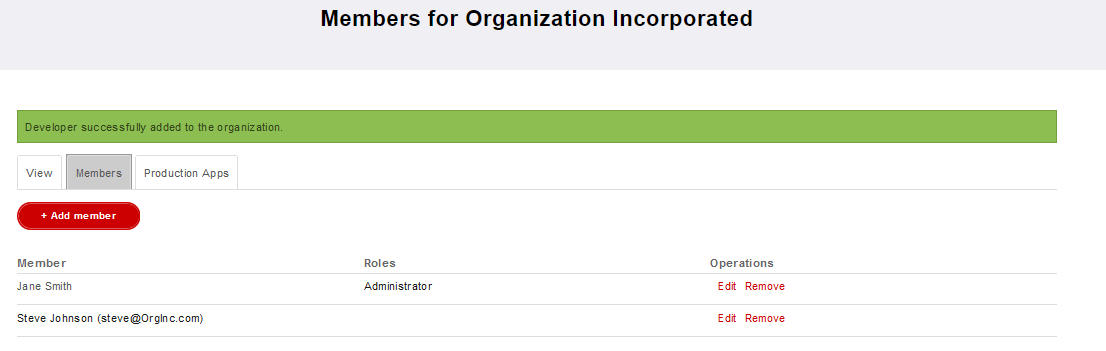
The developer has been added to the organization:
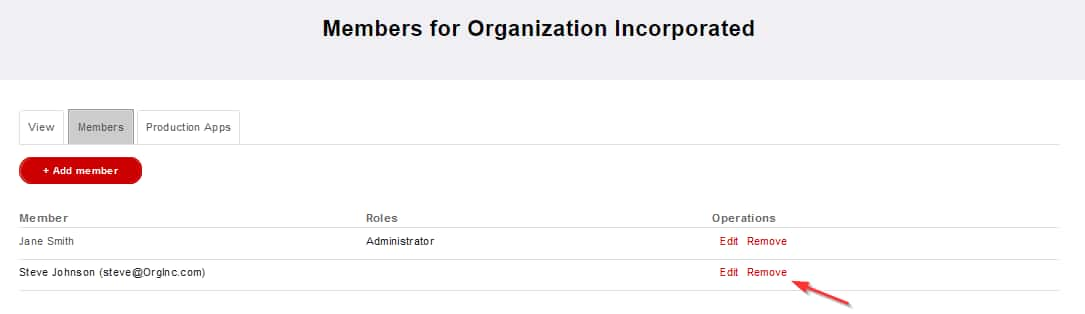
Remove a Member from the Organization
To remove a member, click the Remove item across from the member to remove:
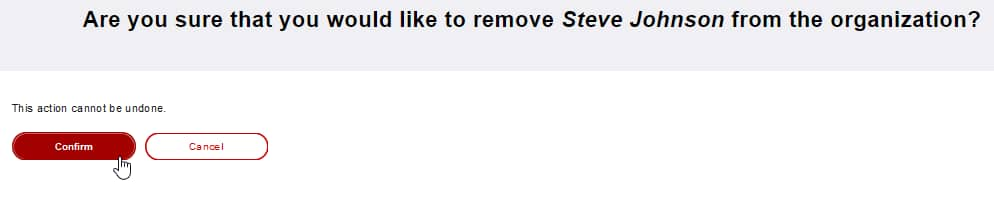
Then confirm member removal by clicking Confirm:
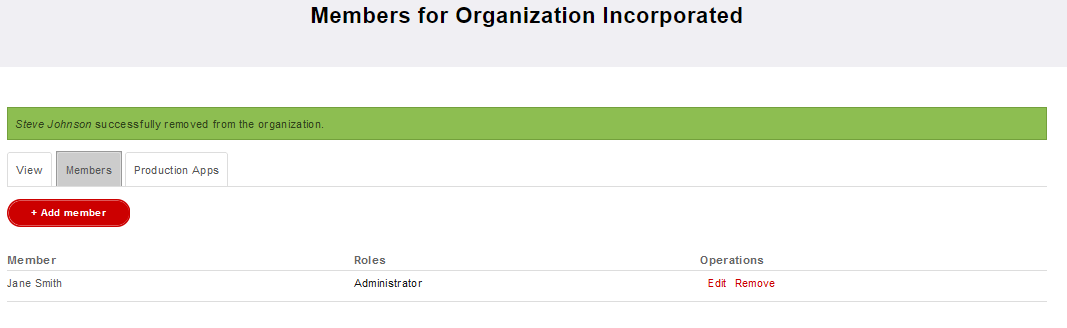
The member has been removed from the organization:
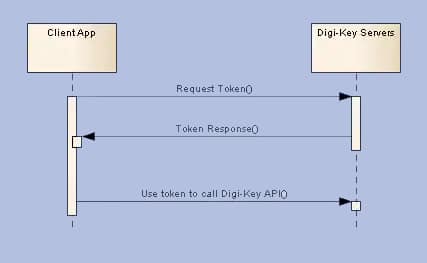
2 Legged Authorization
Basic Steps
All client applications, both Production and Sandbox, follow a basic pattern when making requests to a Digi-Key API with the OAuth 2.0 framework.
Register an Application
When you create your application, you are given an OAuth2 client ID and client secret. Copy and secure this information for your client application.
Get an access token
Get an access token by sending the client id, client secret, and grant type to the authorization server’s token endpoint. You will receive an access token..
Send the access token to an API
By passing the access token with a request header, the client application can now make requests to the Digi-Key API it is subscribed to. When the access token expires, a new request must be made.
Accessing a Production Application
Contained below is the necessary information to complete the OAuth process for DigiKey Applications. Before continuing please confirm that a client application is registered, its client id and client secret are stored and secured, and its subscribed to an API Product.
Getting the Access Token
The URL used to get your token is:
Access Token Endpoint | Description |
|---|---|
This endpoint is the target of the request. The result of requests to this endpoint is the access token |
The request for an access token is an HTTPS POST request and must include the following x-www-form-urlencoded data:
Field | Description |
|---|---|
client_id | The client id assigned to the registered application. |
client_secret | The client secret assigned to the registered application. |
grant_type | As defined in the OAuth 2.0 specification, this field must contain the value client_credentials |
An example of an access token POST request
POST /v1/oauth2/token HTTP/1.1
Host: api.digikey.com
Content-Type: application/x-www-form-urlencoded
client_id={application_client_id}&
client_secret={application_client_secret}&
grant_type=client_credentials
A successful response to this request contains these fields:
Field | Description |
|---|---|
access_token | The token sent to access a Digi-Key API. |
expires_in | The remaining lifetime of the access token, in seconds. |
token_type | The token type being returned. |
A successful response is returned as a JSON object.
Example response to a successful access token request:
{
"access_token": "SLKDosk89/DOSID-frt3234SLsofds",
"expires_in": 599,
"token_type": "Bearer",
}
Note: Other fields may be included in the response, and your application should not treat this as an error. The set shown above is the minimum set.
Token Expiration Time
Type | Expires in |
|---|---|
Access Token | 10 minutes |
Making an API Call
With OAuth completed the application can send a request.
Application example request
Example request to ProductSearch using organization credentials and endpoint (api.digikey.com):
GET /products/v4/search/P5555-ND/productdetails HTTP/1.1
Host: api.digikey.com
X-DIGIKEY-Client-Id: heWGx9w6DK8kZf3jRv5E9jUAhXrGBU67
Authorization: Bearer s4T5DbmFZadjNRAEbUnN9zkU3DBj
X-DIGIKEY-Locale-Site: US
X-DIGIKEY-Locale-Language: en
X-DIGIKEY-Locale-Currency: USD
X-DIGIKEY-Customer-Id: 0
The Value of the Authorization header must be prefixed with "Bearer"
e.g.: "Authorization": "Bearer xGr69sdAjLmnAHwGF4R1HedfDHl3j"
or you will get a Bearer token error.
Accessing a Sandbox Application
The process to access a Sandbox application is the same as for a Production application.
The only difference is that the Host name is sandbox-api.digikey.com.
3 Legged Authorization
Basic Steps
All client applications, both Production and Sandbox, follow a basic pattern when making requests to a Digi-Key API with the OAuth 2.0 framework.
Register an Application
When you create your application, you are given an OAuth2 client ID and client secret. Copy and secure this information for your client application.
Get an Authorization Code
Get an authorization code by having the end user authenticate themselves by logging into their DigiKey account. After login the user is asked to authorize access for the client application to the user's DigiKey account. When the user grants permission, DigiKey's authorization server responds with an authorization code. If the user does not grant the permission, the authorization server returns an error.
Get an access token
Get an access token by sending the authorization code, client id, client secret, and grant type to the authorization server’s token endpoint. You will receive an access token and a refresh token.
Send the access token to an API
By passing the access token with a request header, the client application can now make requests to the DigiKey API it is subscribed to. When the access token expires, the client application can submit the stored refresh token to receive a new set of credentials.

Production Application
Contained below is the necessary information to complete the OAuth process for Production Applications. Before continuing please confirm that a client application is registered, its client id and client secret are stored and secured, and its subscribed to a Production API Product.
Getting the Authorization Code
The endpoint for authentication of the user, this is done in a browser:
Production Authorization Endpoint | Description |
|---|---|
This endpoint is the target of the initial request. It handles authenticating the user and user consent. The result includes the authorization code. |
The set of required query parameters to send url encoded in the browser:
Parameter | Values | Description |
|---|---|---|
response_type | code | Tells the Authorization Server to return an authorization code. |
client_id | The client id assigned to the registered application. | Identifies the client that is making the request. The value passed in this parameter must exactly match the value assigned by the API Portal. |
redirect_uri | Developer defined redirect URI | Determines where the response code is sent. The value of this parameter must exactly match the URI provided when the application was registered (including trailing '/'). The redirect_uri is provided by the client. The redirect_uri must use TLS (https://) to securely receive the code. |
state (optional) | An opaque value used by the client to maintain state between the request and callback. | The authorization server includes this value when redirecting the user-agent back to the client. The parameter SHOULD be used for preventing cross-site request forgery. |
An example url encoded code request with the required query parameters:
https://api.digikey.com/v1/oauth2/authorize?response_type=code&client_id=123456789abcdefg&redirect_uri=https%3A%2F%2Fclient-app-redirect-uri%2F
Bold in the example above highlights the url encoding of characters. The character ":" is url encoded as "%3A" . The character "/" is url encoded as "%2F"
As seen in browser:

Handling the Response
The response will be sent to the redirect URI as specified in the request URL (and as registered to the application). If the user approves the access request, then the response contains an authorization code. If the user does not approve the request, the response contains an error message. All responses are returned to the browser on the query string, as shown below:
An error response:
https://client-app-redirect-uri/code?error=access_denied
An authorization code response:
https://client-app-redirect-uri/code?code=lboI52TG&scope=&state=nullNote: The code (ex: lboI52TG) will expire one minute from creation
Getting the Access Token
After the browser receives the authorization code, your application must exchange the authorization code for an access token and a refresh token. The URL used to get your token is:
Access Token Endpoint | Description |
|---|---|
This endpoint is the target of the second request. The result of requests to this endpoint includes the access token and refresh token |
The request for an access token is an HTTPS POST request and must include the following x-www-form-urlencoded data:
Field | Description |
|---|---|
code | The authorization code returned from the initial request. The code expires one minute after creation |
client_id | The client id assigned to the registered application. |
client_secret | The client secret assigned to the registered application. |
redirect_uri | Determines where the response code is sent. The value of this parameter must exactly match the URI defined when the application was registered (including trailing '/'). The redirect_uri is provided by the client. Fill in the client application's registered value for the redirect_uri. |
grant_type | As defined in the OAuth 2.0 specification, this field must contain the value authorization_code. |
An example of an access token POST request:
POST /v1/oauth2/token HTTP/1.1 Host: api.digikey.com Content-Type: application/x-www-form-urlencodedcode=lboI52TG&
client_id={application_client_id}&
client_secret={application_client_secret}&
redirect_uri=https://client-app-redirect-uri&
grant_type=authorization_code
A successful response to this request contains these fields:
Field | Description |
|---|---|
access_token | The token sent to access a DigiKey API. |
refresh_token | A token that can be submitted to obtain a new access token. |
expires_in | The remaining lifetime of the access token, in seconds. |
refresh_token_expires_in | The remaining lifetime of the refresh token, in seconds. |
token_type | The token type being returned. |
A successful response is returned as a JSON object.
Example response to a successful access token request:
{ "access_token": "SLKDosk89/DOSID-frt3234SLsofds", "refresh_token": "oPu5qu7wPhuVBcTZqmx4NFfhlnSB6hVUJ5uSIhS0CM", "expires_in": 1799, "refresh_token_expires_in": 7775999, "token_type": "BearerToken", } Note: Other fields may be included in the response, and your application should not treat this as an error. The set shown above is the minimum set.
Using the Refresh Token
As indicated in the previous section, a refresh token is obtained when you get your initial access token. Your application may obtain a new access token by sending the refresh token to DigiKey's Authorization Server.
To obtain a new access token this way, your application sends an HTTPS POST request to the token endpoint,
https://api.digikey.com/v1/oauth2/token
The request must include this set of required parameters:
Field | Description |
|---|---|
client_id | The client id assigned to the registered application. |
client_secret | The client secret assigned to the registered application. |
refresh_token | The stored refresh token to submit. |
grant_type | As defined in the OAuth 2.0 specification, this field must contain a value of refresh_token. |
An example refresh token POST request:
POST /v1/oauth2/token HTTP/1.1 Host: api.digikey.com Content-Type: application/x-www-form-urlencodedclient_id={application_client_id}&
client_secret={application_client_secret}&
refresh_token=123Asfeksodk/jkdsoieDSioIOS-483LidkOOl&grant_type=refresh_token
As long as the user has not revoked the access granted to your application, the response provides a new set of tokens.
Example response to a successful refresh token request:
{ "access_token": "SLKDosk89/DOSID-frt3234SLsofds", "refresh_token": "oPu5qu7wPhuVBcTZqmx4NFfhlnSB6hVUJ5uSIhS0CM", "expires_in": 1799, "refresh_token_expires_in": 7775999, "token_type": "BearerToken", } Note: The refresh token is regenerated each time you get a new access token. You must use the latest refresh token to get a new access token. Previous refresh tokens will no longer be valid.
Code and Token Expiration Time
Type | Expires in |
|---|---|
Authorization Code | 1 minute |
Access Token | 30 minutes |
Refresh Token | Does not expire |
Making an API Call
With OAuth completed the application can send a request.
Organization application example request (Production)
Example request to PartSearch using organization credentials and endpoint (api.digikey.com):
GET /Search/v3/Products/p5555-nd HTTP/1.1Host: api.digikey.comX-DIGIKEY-Client-Id: heWGx9w6DK8kZf3jRv5E9jUAhXrGBU67Authorization: Bearer s4T5DbmFZadjNRAEbUnN9zkU3DBjX-DIGIKEY-Locale-Site: USX-DIGIKEY-Locale-Language: enX-DIGIKEY-Locale-Currency: USDX-DIGIKEY-Locale-ShipToCountry: usX-DIGIKEY-Customer-Id: 0
The Value of the Authorization header must be prefixed with "Bearer"
e.g.: "Authorization": "Bearer xGr69sdAjLmnAHwGF4R1HedfDHl3j"
or you will get a Bearer token error.
Accessing a Sandbox Application
The process to access a Sandbox application is the same as for a Production application.
The only difference is that the Host name is sandbox-api.digikey.com.